In this tutorial, we’ll look at how to select cases in SPSS, and how to work with the resultant filtered data.
The Data
The data we’re using for this tutorial comes from a hypothetical study that examines how long it takes people to fall asleep during a statistics lesson.
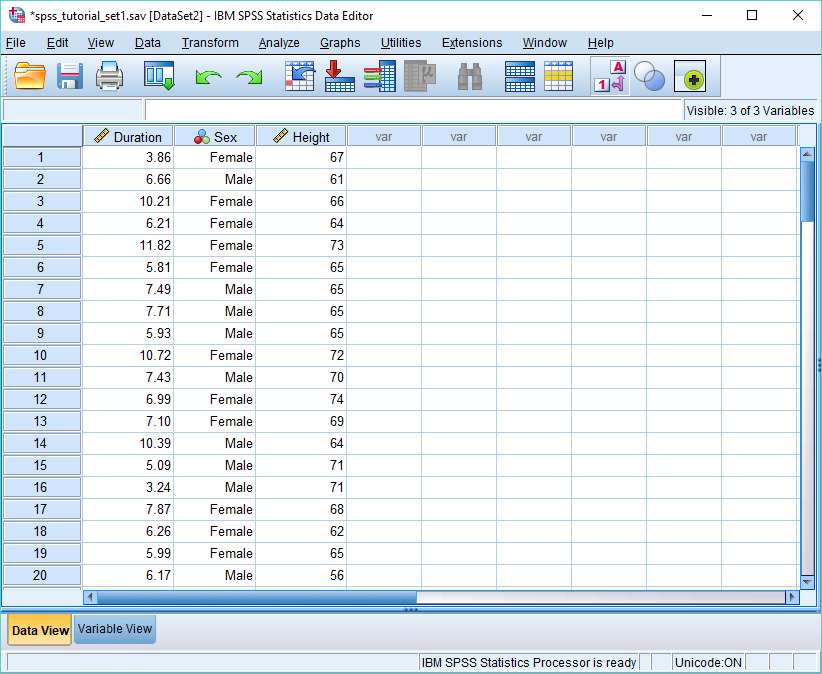
The two variables we’re interested in here are Sex, either male or female, and Duration, which is the number of minutes that elapses from the start of a statistics lesson before a subject falls asleep.
Imagine we already know that in the population as a whole the average amount of time it takes for a woman to fall asleep is 8.15 minutes. We want to compare this to the average time for women in our sample. But the trouble is our sample contains data for both males and females, and any tests we run will be on that basis. The question is how do we select only female cases, thereby excluding males from any tests that we run?
Select Cases
This is where the select cases functionality comes in useful.
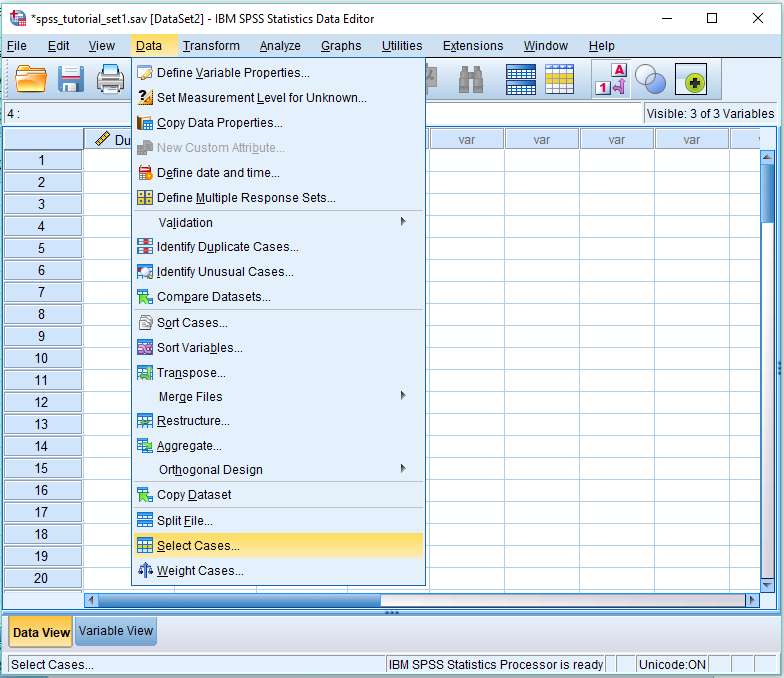
To begin, click Data -> Select Cases.
This will bring up the the Select Cases dialog box. This provides a number of different options for selecting cases. We’re going to focus on the “If condition is satisfied” option, which you should select.
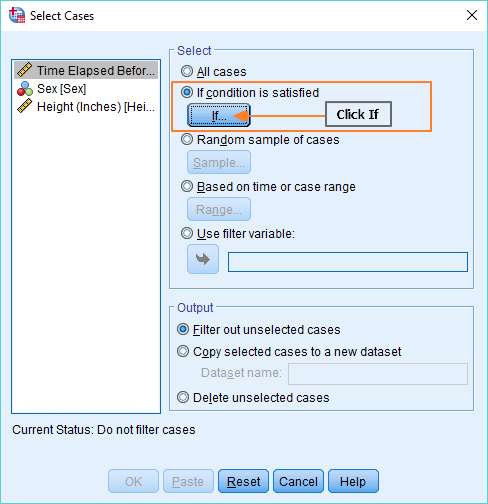
Once you’ve selected it, you need to click on the If… button (as above).
The Select Cases: If dialog box will appear. This is where you do the work of selecting female only cases.
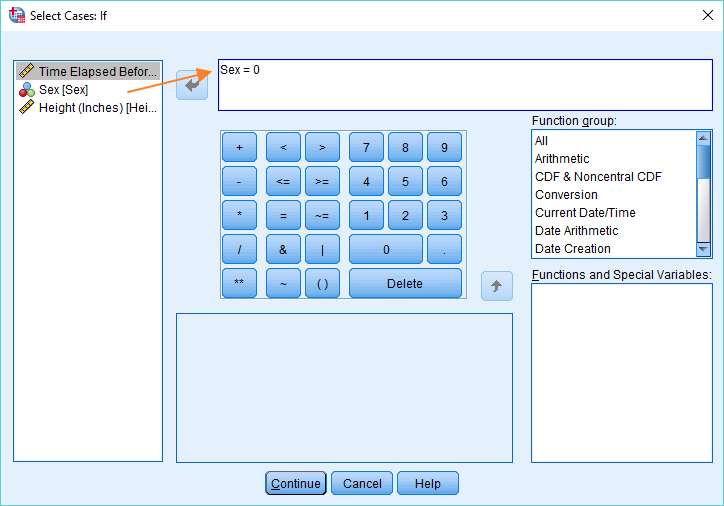
The idea here is to construct an expression in the text box at the top that functions to select cases. You can see here we’ve got “Sex = 0”, which tells SPSS that it should only select cases where the value of the variable Sex is 0 (Female = 0, Male = 1).
Obviously, it is possible to build much more complex expressions than this simple test of equivalence. For example, you could tell SPSS to select cases where Sex is Female and Height is greater than 68 inches (“Sex = 0 & Height > 68”), or where Duration is greater than 8 minutes or Height is less than 60 inches (“Duration > 8 | Height < 60”).
Once you’ve set up the expression, as above, hit the Continue button, and then click OK in the Select Cases dialog box. SPSS will now select cases as per your instruction(s).
Cases Selected
If you take a look at the Data View, you’ll see that things have changed to indicate that SPSS is now operating with a subset of the original data set.
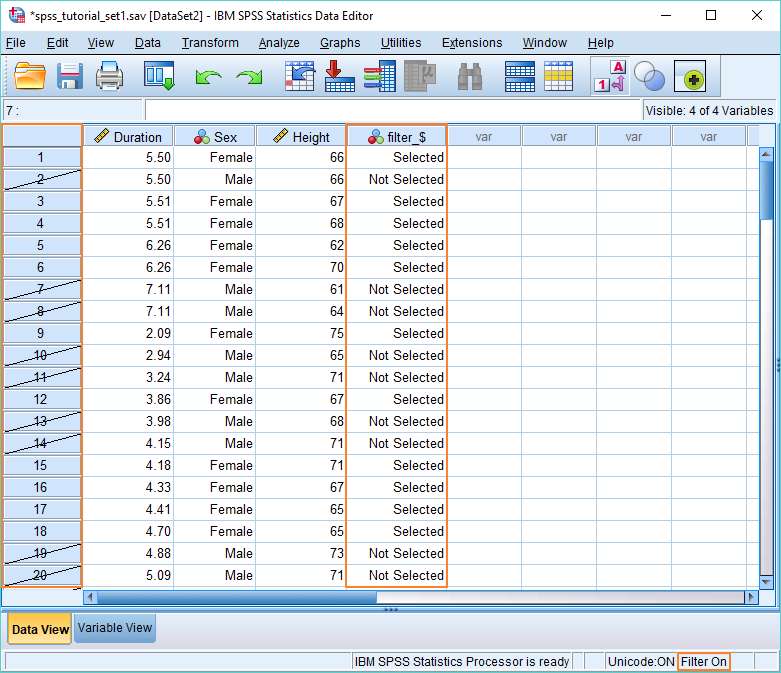
As you can see, SPSS has struck out cases on the left that are not selected. It has also introduced a new filter variable that specifies whether a case has been selected or not. Finally, bottom right, it says Filter On, which tells you that any tests or analyses you run will be on a subset of the data – that is, on only the selected cases.
One Sample T Test
Let’s check this out by running a one sample t test to compare the average amount of time it takes for women in the general population to fall asleep in a statistics lesson with the average for the women in our sample.
Click on Analyze -> Compare Means -> One-Sample T Test, and then set up the test like this.
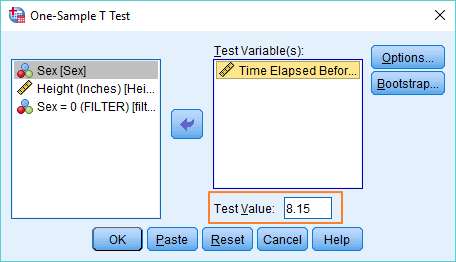
You can see we’ve got Duration as our test variable, and we’re comparing it against a population mean of 8.15 minutes (the average amount of time it takes women in the general population to fall asleep in a statistics lesson).
Hit OK to run the test.
The Result
This is the result.
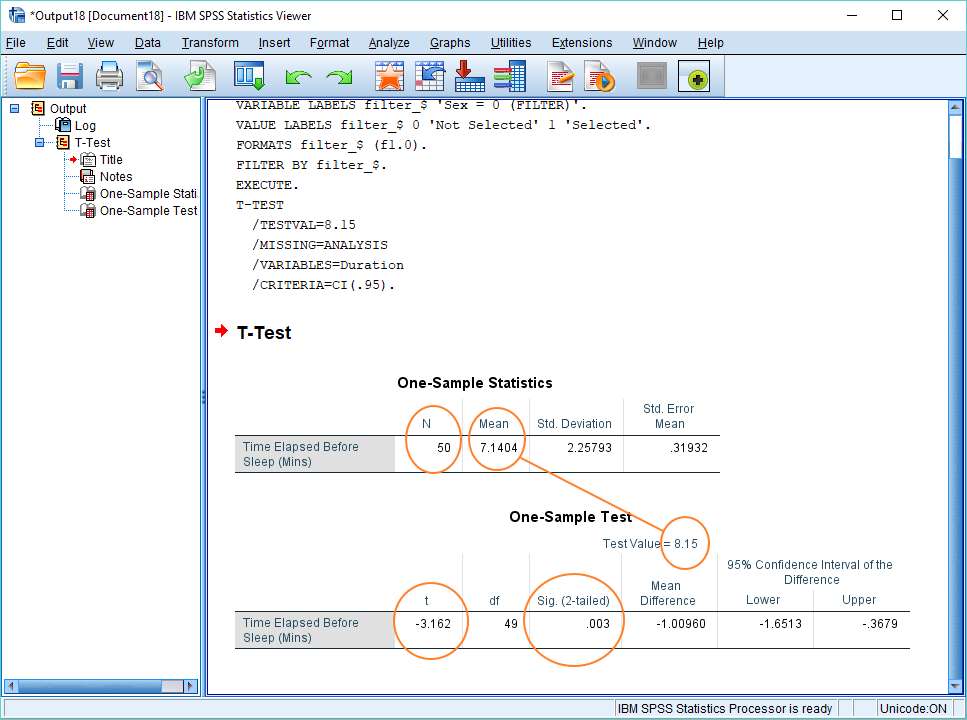
The value for N here is 50, which tells you immediately that select cases has worked. Our dataset has 100 cases within it, of which 50 are women.
In terms of the result, we can see that the women in our sample fall to sleep on average 1 minute faster than women in the general population. This is a significant difference, with a t value of -3.1 and a p-value of .003.
Final Words
There are a couple of things to note before we finish.
The first is that you can return a data set to its non-filtered state by returning to the Select Cases dialog box (Data -> Select Cases), and choosing All cases (the first option available). This won’t delete the new filter variable, but it will render it inactive. You’ll also notice that “Filter On” will no longer show at the bottom right of the Data View.
The other thing to note is that SPSS offers an alternative to Select Cases that works better in many situations. This is Split File.
***************
That’s all for this tutorial. You should now be able to select cases in SPSS, and to work with the resultant filtered data.